Wednesday, November 20, 2024

How to Craft a Statement-Making Wooden Wall Clock

How to Craft a Statement-Making Wooden Wall Clock

Crafting a Statement-Making Wooden Wall Clock

A wooden wall clock can be more than just a time-telling device; it can be a beautiful and unique piece of art that adds character and warmth to your home. With a little creativity and some basic woodworking skills, you can craft a statement-making clock that will be the envy of your friends and family.

Choosing Your Wood

The first step is to choose your wood. Consider the style of your home and the overall aesthetic you're going for. Here are some popular choices for wood clocks:

  • Reclaimed wood: Adds a rustic and vintage charm. Look for old barn wood, pallets, or even salvaged furniture.
  • Walnut: Provides a rich, dark brown hue with beautiful natural grain patterns.
  • Maple: Offers a light, warm color with prominent grain patterns.
  • Cherry: Has a distinctive reddish-brown color that deepens with age.

Designing the Clock Face

Before you start cutting, sketch out your design. Think about the shape of the clock face, the number placement, and any other decorative elements you want to include. Consider these design elements:

  • Shape: A classic circular design is always safe, but consider branching out with a square, hexagonal, or even an irregular shape.
  • Numbers: Roman numerals can add a touch of elegance, while Arabic numerals offer a more contemporary look. You can even use unique materials like metal or tile for the numbers.
  • Decorations: Incorporate carvings, inlay work, or woodburning to enhance the design. For a rustic look, consider leaving the wood in its natural state or adding a distressed finish.

Cutting and Shaping the Wood

Use a saw to cut the wood into the desired shape for the clock face. If you're working with reclaimed wood, you may need to sand down the surface to create a smooth finish. Use a drill press to create holes for the clock hands and the clock mechanism.

Installing the Clock Mechanism

Choose a quartz clock mechanism for accuracy and longevity. Most mechanisms come with instructions for installation. You'll need to attach the mechanism to the back of the clock face and then connect the clock hands.

Finishing Touches

Once your clock is assembled, add your finishing touches. You can stain, paint, or varnish the wood to create the desired look. If you want a more rustic look, consider using a wood sealant to protect the wood's natural beauty.

Hanging Your Wooden Wall Clock

Finally, decide how you want to hang your clock. You can use a simple nail, a picture hanging system, or a decorative hook. Make sure to choose a sturdy hanging method that can support the weight of the clock.

Crafting a wooden wall clock is a rewarding experience that allows you to create a personalized piece of art that reflects your individual style. Let your creativity run wild and enjoy the process of bringing your unique clock to life!

Tuesday, November 19, 2024

Unique Woodworking Gifts for a Handmade Christmas

Unique Woodworking Gifts for a Handmade Christmas

Unique Woodworking Gifts for a Handmade Christmas

Christmas is just around the corner, and you know what that means? Time to get crafty! If you're a woodworking enthusiast, you're in luck. There's no better way to show your loved ones you care than with a handcrafted gift, filled with warmth and personality.

But don't worry, you don't need to be a seasoned woodworker to create something special. With a little creativity and these unique ideas, you can whip up a heartwarming gift that'll be cherished for years to come.

Gifts for the Kitchen

The kitchen is the heart of the home, so it's the perfect place to start your woodworking gift journey. Think about the people you're shopping for â€" what do they love to cook? What kitchen tools do they use most? Here are some ideas to spark your imagination:

Cutting Boards

Classic and timeless, a handcrafted cutting board is always a welcome addition to any kitchen. Get creative with the wood species â€" cherry adds warmth, walnut brings sophistication, and maple offers durability. You can even personalize it with a special inscription or a unique design. Think about adding a juice groove to make it even more functional.

Wooden Utensil Holders

No more messy drawers! A wooden utensil holder not only keeps things organized but also adds a touch of rustic charm to the countertop. You can keep it simple with a classic cylindrical design or experiment with more intricate shapes and carvings. Consider adding a built-in knife block for an extra touch of practicality.

Personalized Spice Racks

Spice up their kitchen with a custom spice rack! A small, compact rack is perfect for smaller kitchens, while a larger, tiered rack can hold a wider variety of spices. Don't forget to add labels with the spice names for easy identification.

Gifts for the Home

Looking for something to elevate their home décor? These woodworking projects are sure to impress and create a cozy atmosphere.

Picture Frames

Give their favorite photos a stunning frame! Go for a simple, minimalist design with clean lines, or add intricate details like carvings or inlays. You can even use different wood species to create a multi-layered effect.

Decorative Wall Shelves

Wall shelves are perfect for displaying cherished trinkets or adding a touch of whimsy to an empty wall. Get creative with the shape â€" go for geometric patterns, curves, or even floating shelves. Don't forget to sand and finish the wood to a beautiful sheen.

Wooden Coasters

Protect their furniture from hot mugs and spills with a set of handcrafted coasters. Use a variety of wood species to create a colorful and unique set. You can also add decorative elements like burned designs or epoxy resin accents for a modern look.

Gifts for the Gardener

Know a green thumb who loves to spend time in their garden? These woodworking projects are perfect for adding a personal touch to their outdoor space.

Planter Boxes

Give them a gift that will bring their garden to life! You can create simple rectangular boxes or go for more intricate designs with curved edges or rounded corners. Remember to use outdoor-friendly wood and seal it with a weather-resistant finish.

Trellis

A trellis is a beautiful and practical way to add height and support to climbing plants. Get creative with the design â€" you can create a simple lattice pattern or a more ornate design with scrolls or arches.

Birdhouses

Create a cozy home for feathered friends! Birdhouses are a classic woodworking project that can be as simple or complex as you like. Choose a variety of wood species and add decorative elements like shingles or a small porch.

Gifts for the Kids

Let your inner child shine! These woodworking projects are fun and imaginative, perfect for sparking creativity and bringing joy to the little ones.

Toy Trains

Travel back in time with a handcrafted wooden toy train! You can create a simple locomotive with boxcars or go all out with a multi-car train set, complete with a track and a station. Use bright colors and paint to make it extra special.

Wooden Puzzles

Puzzles are a timeless activity that promotes problem-solving skills and encourages imaginative play. You can create simple jigsaw puzzles with geometric shapes or more complex puzzles with pictures or words. Use wood scraps for a truly unique and sustainable project.

Wooden Dolls

Bring a dollhouse to life with handcrafted wooden dolls! You can create simple, stylized dolls with basic shapes or more intricate dolls with detailed clothing and hair. Don't forget to add a touch of personality with unique facial features.

Commonly Asked Questions

What type of wood is best for woodworking gifts?

The best type of wood will depend on the specific project and your desired aesthetic. Some popular choices include:

  • Maple: Hard and strong, with a beautiful grain pattern, great for cutting boards and other durable items.
  • Cherry: Known for its warm reddish-brown hue, perfect for decorative items and furniture.
  • Walnut: Rich brown color with striking grain patterns, ideal for high-end projects like picture frames or decorative boxes.
  • Pine: Soft and easy to work with, perfect for beginner projects like birdhouses and small toys.

What are some good finishing options for woodworking gifts?

There are many finishing options available to protect and enhance the appearance of your woodworking projects. Some popular choices include:

  • Oil finishes: Natural and easy to apply, great for enhancing the grain pattern and providing a subtle sheen. Popular options include mineral oil, linseed oil, and tung oil.
  • Varnish: Provides a durable and protective finish, offering a higher shine and resistance to water and scratches. Choose from gloss, semi-gloss, or satin finishes based on your desired look.
  • Polyurethane: A tough and durable finish, ideal for outdoor projects or items that need extra protection. Available in a variety of finishes, including gloss, semi-gloss, and satin.

How do I personalize my woodworking gifts?

There are endless ways to personalize your woodworking gifts! Here are a few ideas:

  • Engraving: Add a personal touch with a laser-engraved message, name, or design.
  • Inlays: Use contrasting wood species to create intricate designs and patterns.
  • Burning: Create unique designs and images with wood burning tools.
  • Painting: Add a splash of color with paints or stains.

No matter what your woodworking skills are, there's a perfect handmade gift out there for everyone on your list. So put on your thinking cap, grab your tools, and get ready to create something truly special this Christmas.

How to Build a Wooden Jewelry Box with a Floating Design or Hidden Drawers

How to Build a Wooden Jewelry Box with a Floating Design or Hidden Drawers

Crafting a Stunning Wooden Jewelry Box: Floating Design and Hidden Drawers

Building a wooden jewelry box is a rewarding project, but adding a touch of elegance with a floating design and hidden drawers elevates it to a work of art. These features not only enhance the aesthetics but also offer a sense of mystery and practicality. Let's embark on this journey of crafting a beautiful and functional jewelry box.

Planning Your Masterpiece: Choosing the Right Wood and Design

Before you dive into the world of saws and sanders, carefully choose the wood and design. Consider the following:

Wood Selection:

  • Hardwoods: Oak, cherry, walnut, and maple are known for their durability, beautiful grains, and ability to hold intricate details. They lend a classic and luxurious feel to the jewelry box.
  • Softwoods: Pine, cedar, and redwood offer a more rustic aesthetic. They are easier to work with but might require more care for durability.

Design Inspiration:

Sketch your vision or browse online for inspiration. Consider these features:

  • Floating Top: This creates an illusion of the top hovering above the base, adding a touch of magic.
  • Hidden Drawers: These can be concealed behind the floating top or integrated into the sides of the box.
  • Ornate Details: Carvings, inlays, or decorative hardware can elevate the design further.

Crafting the Base: A Sturdy Foundation for Your Jewelry Box

Begin by constructing the base of your jewelry box. This forms the solid foundation upon which you'll build the rest of the masterpiece.

  1. Cut the Base Pieces: Using precise measurements, cut the base pieces from your chosen wood. These will form the bottom and sides of the box.
  2. Join the Base Pieces: Use wood glue and clamps to join the base pieces together, creating a strong and sturdy base.
  3. Sand the Base Smooth: Sand the base thoroughly to ensure a smooth and even surface for the top.

Creating the Floating Illusion: Constructing the Top

Now, the magic begins. This is where you build the top that will appear to float above the base.

  1. Cut the Top: Cut the top to your desired dimensions, making sure it slightly overhangs the base to create the floating effect.
  2. Prepare for Floating: Depending on your design, you might add support beams or decorative pillars that will help to lift the top slightly off the base.
  3. Create the Floating Effect: Use small, strategically placed brackets or wooden supports to lift the top a fraction of an inch above the base. These supports will be concealed and will create the illusion of a floating top.

Adding Hidden Storage: Designing and Installing Drawers

Now, the fun part: incorporating hidden drawers for your treasured jewelry.

  1. Design the Drawers: Create small drawers that fit within the base of the box or the sides. You can choose simple rectangular drawers or get creative with unique shapes.
  2. Construct the Drawers: Cut the drawer sides, bottom, and front from your chosen wood. Use wood glue and clamps to assemble them.
  3. Install Drawers: Choose a drawer slide system that fits your design. Mount the slides to the inside of the box and the drawers. Ensure a smooth and silent operation.

Finishing Touches: Enhancing Your Jewelry Box

It's time to add the finishing touches that transform your creation into a stunning piece of furniture.

  1. Sanding and Staining: Sand the box thoroughly, paying attention to all corners and edges. Apply a stain to enhance the wood's natural beauty or choose a paint color that complements your design.
  2. Applying a Protective Finish: Seal the wood with a clear coat, such as polyurethane, to protect it from scratches and moisture. Choose a satin or gloss finish depending on your preference.
  3. Decorative Accents: Add decorative hardware like hinges, handles, or knobs that complement your chosen style. You can even add a touch of personalization with a nameplate or engraved inscription.

A Treasure to Cherish: Your Completed Jewelry Box

As you admire your finished jewelry box, you'll realize that more than just a storage container, it's a work of art that reflects your creativity and craftsmanship. It's a treasure to cherish, a testament to your dedication, and a beautiful way to safeguard your cherished jewelry for years to come.

Monday, November 18, 2024

Quick Woodworking Ideas to Start Selling Today

Quick Woodworking Ideas to Start Selling Today

Quick Woodworking Ideas to Start Selling Today

Looking for a way to turn your woodworking hobby into a profitable venture? Look no further! This article will provide you with quick and easy woodworking ideas that you can start selling today. From simple and affordable projects to more complex creations, these ideas will help you tap into the ever-growing demand for handcrafted items.

Simple and Affordable Woodworking Projects

Begin your woodworking journey with projects that are easy to make and sell. These items are ideal for beginners and can be created using readily available materials.

Wooden Coasters

Wooden coasters are a classic and timeless woodworking project. You can create them in various shapes, sizes, and designs. Use different wood types for a unique look, such as walnut, maple, or cherry. You can also personalize them with laser engraving or paint. Sell them as a set or individually.

Cutting Boards

Cutting boards are a kitchen essential that everyone needs. You can make them in different sizes and shapes to cater to various needs. Use durable wood like maple or walnut for longevity. Incorporate a juice groove for easier cleanup.

Keychains

Keychains are a great way to showcase your creativity and woodworking skills. You can create simple keychains with a single piece of wood or use different materials like leather or metal for a more intricate design.

Functional Woodworking Projects

For those who prefer projects with a practical purpose, these functional woodworking items will add a touch of style and elegance to any home.

Plant Stands

Plant stands are a popular item in today's home décor. You can create them in different styles, using reclaimed wood or adding a rustic touch. Incorporate storage space for pots or gardening tools.

Wooden Boxes

Wooden boxes offer endless possibilities for creativity. Make them in different sizes and shapes to suit various purposes. Use them for storage, gifts, or even jewelry boxes.

Decorative Woodworking Projects

If you enjoy creating pieces that add a decorative touch to a space, these woodworking ideas will enhance your home décor.

Wall Clocks

Wall clocks are a classic decorative item that can be made from various wood types. Choose unique shapes and patterns for a modern look. You can also add a personal touch with laser engraving or hand-painted designs.

Mirrors

Mirrors are a functional and decorative item that can enhance any space. You can craft them in different shapes and sizes, incorporating wood for the frame or using it as a decorative element.

This list of woodworking ideas is just the beginning. With a little creativity and experimentation, you can create a wide range of woodworking projects that will appeal to various customers.

Tips for Selling Your Woodworking Projects

To ensure success in selling your woodworking creations, keep the following tips in mind:

  • High-Quality Materials: Use high-quality wood and finishes to ensure durability and a professional look.
  • Excellent Craftsmanship: Focus on precision and detail in your woodworking.
  • Unique Designs: Create distinctive designs that stand out from the competition.
  • Clear Product Photography: Use professional-quality photos to showcase your work.
  • Competitive Pricing: Research similar products and set your prices accordingly.
  • Promote Your Work: Utilize online platforms like Etsy, Instagram, and Facebook to reach potential customers.

Remember, consistency and dedication are key to building a successful woodworking business. Embrace the creativity and joy of woodworking, and you'll be well on your way to turning your passion into a profitable venture.

Wednesday, November 13, 2024

Top Birdhouse Styles That Buyers Look For

Top Birdhouse Styles That Buyers Look For

Top Birdhouse Styles That Buyers Look For

Birdhouses have become an increasingly popular addition to backyards and gardens, offering a delightful way to attract feathered friends and enhance the natural beauty of the surroundings. With a wide array of styles available, choosing the perfect birdhouse can be a daunting task. To assist discerning buyers, this article explores the top birdhouse styles that consistently capture the hearts of bird enthusiasts.

Classic Birdhouses

Classic birdhouses are timeless designs that exude a sense of charm and nostalgia. These traditional styles have stood the test of time and remain beloved for their simplicity and elegance. The most recognizable feature of a classic birdhouse is its simple rectangular or square shape, typically with a pitched roof and a small entrance hole.

Colonial Birdhouses

Colonial birdhouses are inspired by the architectural style of colonial America, featuring a classic gable roof with a distinctive overhang and decorative trim. They often have a small, rectangular base and a single entrance hole centered on the front. These birdhouses evoke a sense of history and add a touch of sophistication to any outdoor space.

Victorian Birdhouses

Victorian birdhouses embrace the ornate and intricate details that characterized the Victorian era. These birdhouses often feature elaborate scrollwork, decorative accents, and a variety of roof shapes, such as gables, turrets, or even cupolas. They can be crafted from a range of materials, including wood, metal, or even ceramic, and are known for their whimsical and charming appearance.

Modern Birdhouses

Modern birdhouses break away from traditional designs, embracing contemporary aesthetics and innovative materials. They often feature clean lines, geometric shapes, and minimalist detailing. These birdhouses are designed to seamlessly integrate into modern landscapes and add a touch of sophistication to any outdoor environment.

Geometric Birdhouses

Geometric birdhouses feature bold, angular shapes that create a visually striking presence. They may be crafted in the form of cubes, cylinders, or pyramids, with contrasting colors and textures to add depth and interest. These birdhouses are ideal for those seeking a modern and edgy look.

Minimalist Birdhouses

Minimalist birdhouses prioritize simplicity and functionality. They often have a simple, uncluttered design with a single entrance hole and a flat roof. They may be crafted from natural materials like wood or bamboo, or from modern materials like metal or acrylic.

Specialty Birdhouses

Specialty birdhouses are designed to cater to specific bird species or offer unique features. They can be found in a wide range of shapes, sizes, and materials, reflecting the creativity of birdhouse enthusiasts.

Bluebird Houses

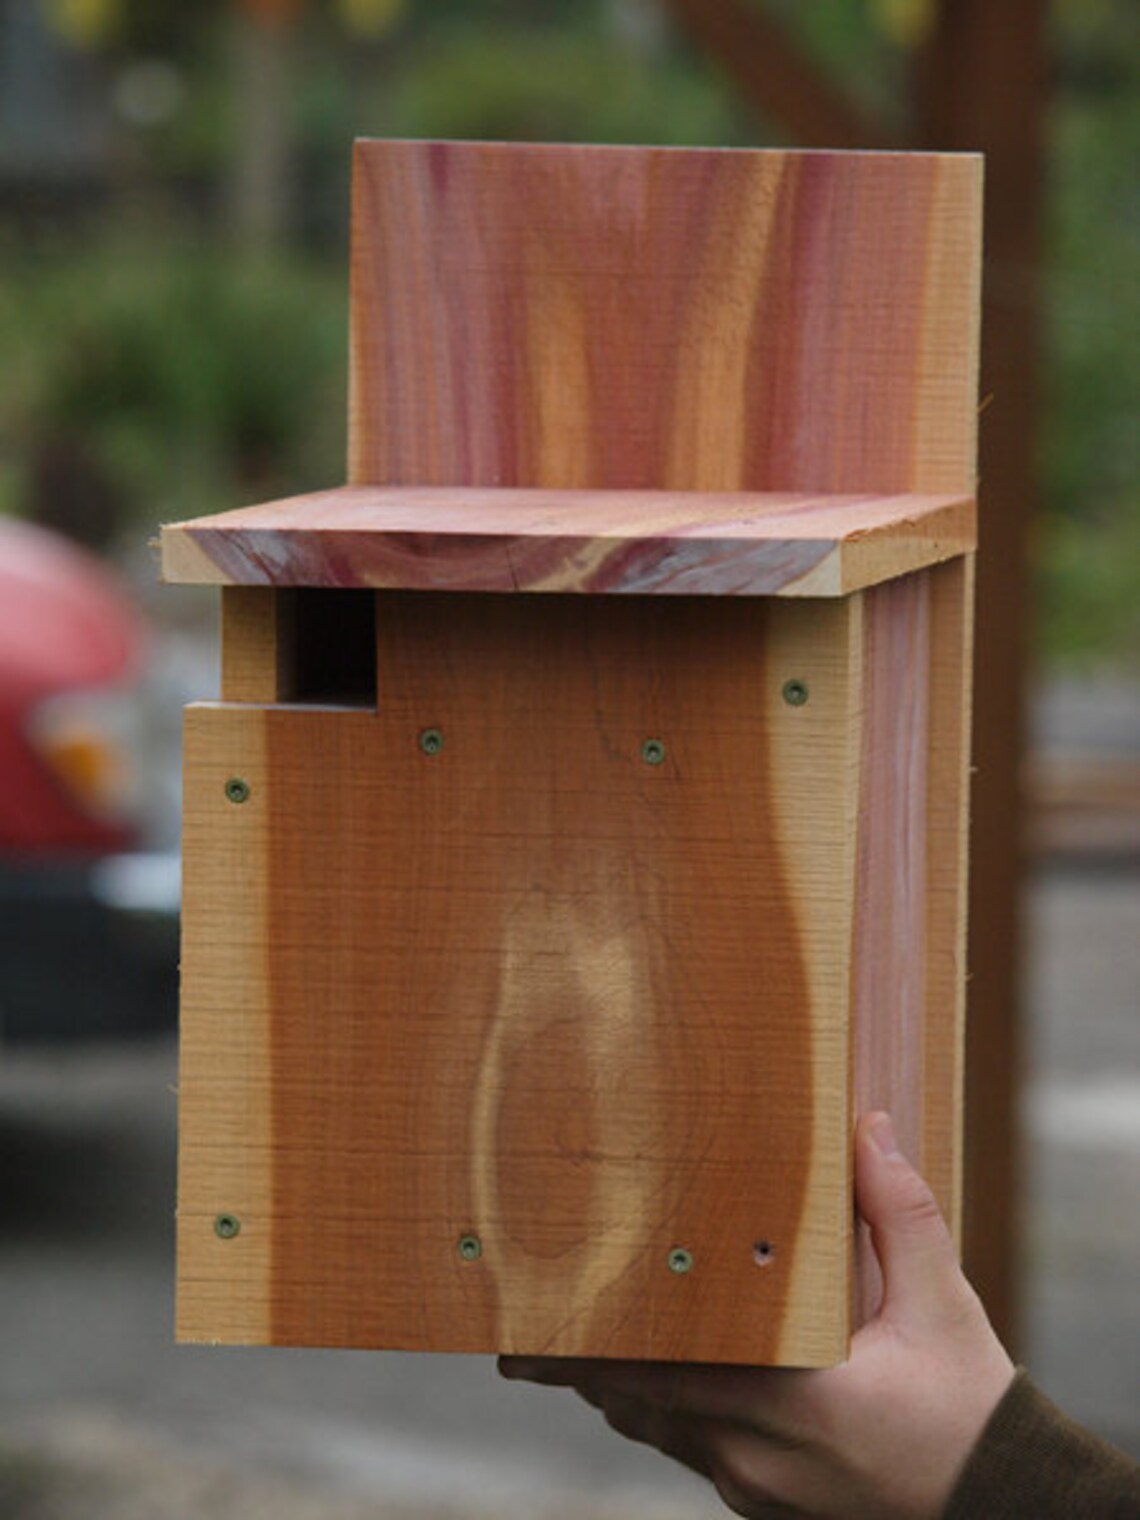
Bluebird houses are specifically designed to attract bluebirds. They typically have a single entrance hole that is relatively small, around 1.5 inches in diameter, to deter larger birds. They are often crafted from wood and may feature a removable floor for easy cleaning.

Squirrel-Proof Birdhouses

Squirrel-proof birdhouses are designed to protect birds from pesky squirrels. They feature various deterrents, such as a metal shield around the entrance hole, a slippery surface, or a baffle that discourages squirrels from climbing. These birdhouses provide a safe haven for birds, ensuring they have a peaceful place to nest and raise their young.

Hanging Birdhouses

Hanging birdhouses are designed to be suspended from a branch or a hook. They often have a rounded shape or a dome-like roof, providing shelter and protection from the elements. Hanging birdhouses are a popular choice for those seeking a whimsical and space-saving option.

Factors to Consider When Choosing a Birdhouse

When selecting a birdhouse, several factors should be taken into account to ensure it meets the specific needs of the birds and the aesthetic preferences of the homeowner.

Bird Species

Different bird species have different preferences for nest boxes. It's essential to consider the size and shape of the entrance hole, the depth of the nesting cavity, and the overall dimensions of the birdhouse. For example, small songbirds require smaller houses with entrance holes around 1.25 inches in diameter, while larger birds like woodpeckers need larger houses with entrance holes of 2 inches or more.

Material

Birdhouses are typically made from a variety of materials, each with its own advantages and disadvantages. Wood is a natural and attractive choice, but it requires regular maintenance to prevent decay. Metal birdhouses are durable and long-lasting but can become hot in direct sunlight. Plastic birdhouses are affordable and easy to clean, but they may not be as aesthetically pleasing as other materials.

Placement

The placement of a birdhouse is crucial to its success in attracting birds. It should be located in a quiet and sheltered spot, away from predators and disturbances. The entrance hole should face away from prevailing winds and heavy rainfall. For optimal results, place the birdhouse at least 5 feet above the ground and at least 10 feet away from any trees or shrubs that could provide hiding spots for predators.

Maintenance

Regular maintenance is essential to keep a birdhouse clean and safe for its feathered occupants. Clean the birdhouse thoroughly after each nesting season to remove debris, droppings, and parasites. Check for any damage or signs of wear and repair or replace the birdhouse as needed.

Conclusion

Choosing the perfect birdhouse is a delightful journey that allows bird enthusiasts to express their individuality and create a welcoming haven for feathered friends. From classic designs to modern styles, there's a birdhouse to suit every taste and preference. By considering factors such as bird species, material, placement, and maintenance, buyers can find a birdhouse that not only attracts birds but also enhances the natural beauty of their outdoor spaces.

Musical Jewelry Box: A Whimsical and Delightful Woodworking Gift

Musical Jewelry Box: A Whimsical and Delightful Woodworking Gift

Musical Jewelry Box: A Whimsical and Delightful Woodworking Gift

Imagine a world where a simple wooden box becomes a gateway to enchantment. A world where the gentle twirl of a key unlocks not just a secret compartment, but a melody that dances in the air, a symphony of sound that evokes pure joy. This is the magic that a musical jewelry box brings to life, and it's a gift that will forever be cherished.

The allure of a musical jewelry box transcends its practical use. It's a testament to the power of craftsmanship, a blend of beauty and functionality that speaks to the heart. It's a gift that evokes nostalgia, reminding us of simpler times when a simple tune could transport us to a world of dreams. It's a gift that's both practical and whimsical, a treasure to be held close and treasured for a lifetime.

Crafting a Piece of Magic

The journey of creating a musical jewelry box is an art form in itself. It involves meticulous planning, precise execution, and a touch of creativity. Here are the key elements that transform a block of wood into a cherished heirloom:

Selecting the Perfect Wood

The choice of wood is crucial. Softwoods like pine or cedar are easy to work with, offering a smooth and delicate finish. For a more luxurious feel, hardwoods like cherry or walnut are ideal, exuding warmth and natural beauty. Each wood species brings its unique grain pattern, adding character and depth to the box.

Designing the Shape and Size

The shape and size of the box are dictated by the intended purpose and personal preference. From classic rectangular boxes to whimsical heart shapes, the possibilities are endless. Consider the size of the jewelry that will be stored and the overall aesthetic you wish to achieve.

Integrating the Music Mechanism

The heart of the musical jewelry box lies in its movement, the mechanism that orchestrates the melodious notes. These movements come in various sizes and styles, ranging from simple, single-note movements to intricate, multi-tune mechanisms. Choose a movement that complements the chosen wood and the overall design.

Adding Finishing Touches

The final touches elevate the musical jewelry box from a simple box to a masterpiece. This could involve sanding the wood to a smooth finish, applying stains or paints to enhance its natural beauty, or adding intricate carvings or inlays. The possibilities are endless, limited only by your imagination.

Unwrapping the Gift of a Musical Jewelry Box

The gift of a musical jewelry box is a gift that goes beyond the tangible. It's a gift of emotion, a gesture that speaks volumes about your thoughtfulness and affection. Imagine the look on the recipient's face as they open the box and are greeted by the enchanting melody. It's a moment of pure joy and wonder, a memory that will be cherished for years to come.

Here are some reasons why a musical jewelry box makes a perfect gift:

  • For a Special Occasion: A musical jewelry box is a thoughtful gift for birthdays, anniversaries, holidays, graduations, or any special occasion.
  • For a Loved One: It's a gift for a partner, a family member, or a close friend, a symbol of your love and appreciation.
  • For a Collector: For those who appreciate intricate craftsmanship and unique pieces, a musical jewelry box makes a wonderful addition to their collection.
  • For a Child: A musical jewelry box sparks imagination and creativity, offering a magical experience for children of all ages.

A musical jewelry box is more than just a piece of furniture, it's a piece of art, a vessel for memories, and a testament to the beauty of handmade craftsmanship. It's a gift that's both practical and whimsical, a treasure to be held close and cherished for a lifetime.

Wood Floating Shelves for Plant Lovers: Display Tips

Wood Floating Shelves for Plant Lovers: Display Tips

Wood Floating Shelves for Plant Lovers: Display Tips

Hey there, plant parents! Are you looking for a stylish and space-saving way to showcase your leafy companions? Look no further than wood floating shelves! These beauties are not only functional but also add a touch of warmth and natural charm to any room. Let's dive into the world of wood floating shelves and explore some tips to create the perfect plant display.

Choosing the Right Shelves

The first step is to choose the right shelves for your plants. Consider these factors:

Size and Shape

Think about the size and shape of your plants. For smaller succulents or cacti, you can opt for narrow shelves. Larger plants, like monsteras or ferns, require wider shelves to accommodate their growth.

Material

While wood is a popular choice for floating shelves, you can also find them in other materials like metal or bamboo. Choose a material that complements your existing decor and the style of your plants.

Finish

Consider the finish of the shelves. Natural wood finishes add a rustic charm, while painted or stained shelves can create a more modern look. Choose a finish that complements your plants and your overall decor.

Number of Shelves

Determine the number of shelves you need based on your plant collection. If you have a lot of plants, multiple shelves can create a lush and layered display. For a smaller collection, one or two shelves may be sufficient.

Planning Your Plant Display

Now that you've chosen your shelves, it's time to plan your plant display. Here are some tips:

Consider the Light

Plants need light to thrive. Before placing your shelves, think about the amount of natural light in your room. Place light-loving plants on shelves that receive direct sunlight, and shade-tolerant plants on shelves that are in indirect light. Be mindful of plant placement to prevent scorching or stunting.

Group Plants by Size and Shape

Create visual interest by grouping plants of similar sizes and shapes together. You can also mix and match different types of plants to create a unique and balanced display. Play with different textures and foliage colors to add depth and dimension.

Mix and Match Heights

To add visual appeal, use shelves of different heights and create a staggered effect. Mix in a couple of hanging plants to add height and drama. This helps to create a layered look and prevents your display from feeling flat.

Think About Color

Think about the colors of your plants and the overall aesthetic you want to achieve. For example, you can create a monochromatic display by using plants with similar colors, or a vibrant display with plants of contrasting colors. You can also incorporate other decorative elements, like colorful pots or planters, to complement the plant colors.

Styling Your Shelves

Now it's time to style your shelves and bring your plant display to life! Here are some ideas:

Pot Choice

Choose pots and planters that complement the style of your shelves and your overall decor. You can opt for neutral colors like white, black, or gray, or add a pop of color with bright pots. Look for pots with interesting textures or patterns to add visual interest.

Decorative Elements

Don't be afraid to add some decorative elements to your shelves, like small sculptures, candles, or books. These can add a personal touch to your display and complement the plant colors. Avoid adding too many items that compete with the plants, or make the space feel too cluttered.

Layer Your Plants

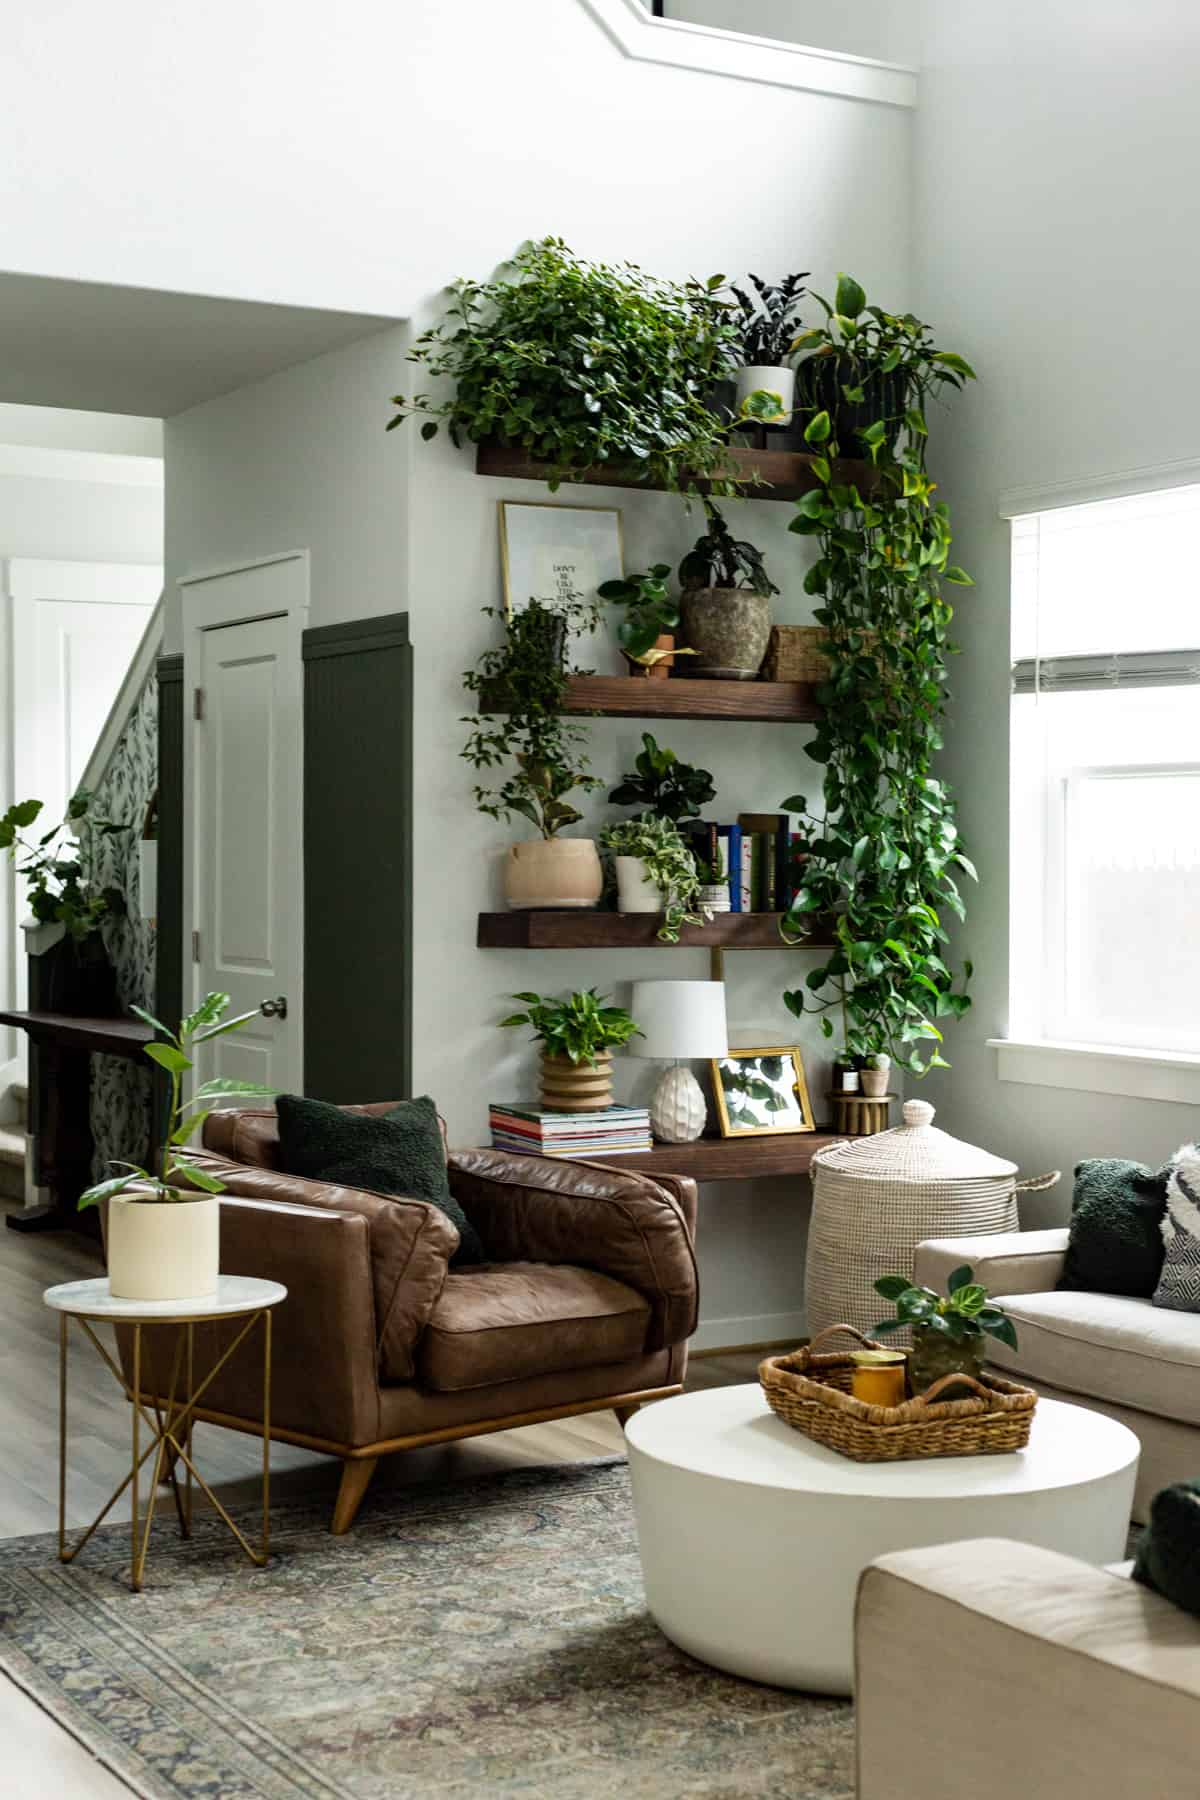
Don't be afraid to layer your plants on the shelves. You can use smaller plants in front of larger plants, or use different heights of plants to create visual interest. Consider adding trailing plants, like pothos or spider plants, to hang down from the shelves.

Tips for Plant Care

Now that you have a beautiful plant display, it's important to keep your plants happy and healthy. Here are some tips:

  • Water Regularly: Water your plants according to their needs. Some plants require more water than others, so it's important to research the specific care requirements of each plant. Overwatering can be detrimental to plant health, so let the top inch of soil dry out between waterings.
  • Fertilize Regularly: Plants need nutrients to thrive. Fertilize your plants according to their needs, but avoid overfertilizing, which can burn the roots. Look for organic fertilizers that are gentle on plants and the environment.
  • Monitor for Pests: Be on the lookout for pests, such as aphids, spider mites, or mealybugs. These can quickly multiply and damage your plants. Take preventative measures to protect your plant collection by keeping your plants clean and free of debris, and use natural pest control methods if necessary.
  • Rotate Your Plants: Rotate your plants regularly to ensure that all sides of the plant receive adequate light. This will help to prevent them from becoming leggy or lopsided.
  • Enjoy Your Plant Paradise

    With a little planning and creativity, you can create a beautiful and thriving plant display on wood floating shelves. Don't be afraid to experiment and have fun with it! Remember to enjoy the process and the satisfaction of bringing life and beauty into your space.

    Exceptional Wooden Gifts with a Personal Twist

    Exceptional Wooden Gifts with a Personal Twist

    Exceptional Wooden Gifts with a Personal Twist

    Hey there, gift-givers! Ever feel stuck in a rut when it comes to finding the perfect present? You know, the kind that truly shows you put some thought and effort into it. Let’s face it, sometimes the usual suspects - candles, chocolates, and gift cards - just don’t cut it. That's where the magic of wood comes in! There's something inherently special about wooden gifts, a kind of warmth and timeless charm that's hard to resist. And when you add a personal touch, they become truly exceptional.

    But let’s be honest, navigating the world of wooden gifts can feel overwhelming. Fear not! I'm here to guide you through the wonderful world of personalized wooden gifts, from practical to whimsical, with something for everyone on your list.

    The Timeless Allure of Wood

    Wood has been cherished for its beauty and durability for centuries. It's a natural material that evokes a sense of warmth, comfort, and craftsmanship. And the best part? Wood is surprisingly versatile! You can find everything from elegant wooden jewelry to sturdy kitchen tools and even personalized home decor.

    The Gift of Thoughtfulness

    You know how much you love the feeling of receiving a gift that shows the giver really knows you? Well, wooden gifts are perfect for that! You can personalize them in so many ways, from engraving a special message to choosing a wood species that reflects the recipient's taste.

    Personalizing Your Wooden Gifts

    Okay, so you're convinced that wood is the way to go. Now, let's dive into the fun part â€" adding that special touch! The possibilities are endless, but here are some ideas to spark your creativity:

    Engraving

    Engraving is a classic way to personalize wooden gifts. Think names, dates, special messages, quotes, or even a simple monogram. It adds a touch of elegance and makes the gift feel extra special. Engraving is great for:

    • Jewelry
    • Cutting boards
    • Picture frames
    • Keychains
    • Wine stoppers

    Hand-Painted Designs

    If you’re feeling crafty, consider painting a unique design onto your wooden gift! This could be anything from a floral pattern to a whimsical animal illustration. It’s a great way to add a personal touch and create a one-of-a-kind piece.

    Laser Cutting

    Laser cutting allows you to create intricate designs and patterns in wood. It's perfect for making unique gifts like:

    • Wooden signs
    • Personalized coasters
    • Decorative wall art
    • Personalized puzzle pieces

    Wood Types: Finding the Perfect Match

    Just like every person is unique, each wood species has its own character and charm. Here's a quick rundown of some popular choices:

    • Maple: Known for its light color, subtle grain, and strength. Great for cutting boards, bowls, and furniture.
    • Cherry: Has a warm, reddish-brown hue and a beautiful grain pattern. Often used for furniture and decorative pieces.
    • Walnut: Renowned for its dark, rich color and bold grain. A popular choice for high-end furniture and decorative items.
    • Oak: A durable and strong wood with a distinctive grain pattern. Great for furniture, flooring, and even jewelry.
    • Bamboo: A sustainable and lightweight wood with a distinctive, natural look. Perfect for cutting boards, coasters, and other eco-friendly gifts.

    Wooden Gift Ideas for Every Occasion

    Still feeling a bit lost? Don’t worry, I’ve got you covered! Here are some wooden gift ideas that are sure to impress, categorized by occasion:

    For the Homebody

    • Wooden cutting board with a personalized message: Perfect for the foodie in your life. Bonus points for adding a cute wooden spatula or cheese knife.
    • Personalized wooden picture frame: A timeless gift that will be cherished for years to come. Choose a frame that complements their decor.
    • Wooden plant stand: For the green thumb in your life. Choose a stand that's the perfect size for their favorite houseplants.

    For the Gadget Guru

    • Wooden phone stand: A sleek and stylish way to charge their phone. You can even personalize it with their initials or a fun quote.
    • Wooden laptop stand: Helps improve posture and reduce neck strain. A practical gift that they'll appreciate.
    • Wooden headphones stand: Keeps their headphones organized and looking good. Choose a stand that matches their style.

    For the Outdoor Enthusiast

    • Personalized wooden compass: A thoughtful gift for the adventurer in your life. Choose a compass with a meaningful inscription.
    • Wooden picnic basket: Perfect for enjoying a meal outdoors. Add a blanket, plates, and silverware for a complete set.
    • Wooden keychain with a hiking or camping theme: A practical and stylish way to keep their keys organized.

    For the Creative Soul

    • Wooden art easel: Perfect for the budding artist in your life. Choose an easel that's adjustable for different sizes of canvas.
    • Wooden jewelry box: A beautiful and practical way to store their favorite pieces. Consider adding a personalized message inside the lid.
    • Wooden carving kit: A fun and creative way to unleash their artistic side. Choose a kit that's appropriate for their skill level.

    Beyond the Gift

    Giving a wooden gift isn't just about presenting a physical object. It's about making a statement, expressing your love and appreciation in a unique and meaningful way. So go ahead, explore the world of wood and find the perfect personalized gift that will leave a lasting impression.

    Easy Woodworking Projects for Kids: Decorating Their Space

    Easy Woodworking Projects for Kids: Decorating Their Space

    Easy Woodworking Projects for Kids: Decorating Their Space

    Woodworking is a rewarding and creative hobby that can provide children with a sense of accomplishment and pride. It's also a great way for them to learn valuable skills like problem-solving, hand-eye coordination, and attention to detail. This article will guide you through simple and safe woodworking projects that kids can tackle to personalize their space and add a touch of charm to their surroundings.

    Safety First: Essential Guidelines

    Before embarking on any woodworking project, it's crucial to prioritize safety. Here are some essential guidelines to keep in mind:

    • Always supervise young children when they're working with tools and materials.
    • Ensure that the work area is clean and well-lit.
    • Use appropriate safety gear, such as safety glasses, dust masks, and gloves.
    • Teach children how to use tools correctly and safely.
    • Start with simpler projects and gradually introduce more challenging ones.
    • Never allow children to use power tools without proper supervision and training.

    Simple and Stylish Projects for Young Woodworkers

    Here are some fun and achievable woodworking projects that kids can undertake to decorate their space:

    1. Wooden Coasters

    Coasters are a practical and decorative addition to any room. Kids can make their own personalized coasters using scrap wood or plywood. Simply cut out squares or circles using a jigsaw or hand saw. Smooth the edges with sandpaper and decorate them with paint, markers, or decoupage techniques. To add a protective layer, apply a sealant or varnish.

    2. Picture Frames

    Picture frames are an excellent way for kids to showcase their favorite photos or artwork. Use simple wooden strips, glue, and nails to create a basic frame. Measure and cut the wood pieces to the desired size, ensuring the corners are joined at a 90-degree angle. Decorate the frame with paint, stencils, or embellishments. For a more elaborate look, kids can try creating picture frames with intricate designs or using wood carving techniques.

    3. Wooden Boxes

    Wooden boxes can be used for storing small items like toys, jewelry, or craft supplies. Kids can build their own boxes using simple woodworking techniques. Cut out the box sides, bottom, and lid using plywood or scrap wood. Join the pieces using wood glue and nails or screws. Sand the edges and apply paint, varnish, or stain for a finished look. To add a decorative touch, kids can paint designs on the box, use decorative hardware, or add a lid hinge.

    4. Wooden Toy Trucks

    Wooden toy trucks are a classic and enduring plaything. Kids can create their own toy trucks using simple woodworking techniques. Cut out the truck body, wheels, and axles from wood. Use glue and nails to assemble the pieces. Paint the truck in bright colors and add details like headlights and windows. For a more advanced project, kids can try building a dump truck or a pickup truck with a removable bed.

    5. Wooden Birdhouses

    Birdhouses are a fun and rewarding woodworking project that kids can enjoy building. They can attract birds to their backyard and provide a home for these feathered friends. Cut out the birdhouse pieces from plywood or scrap wood using a jigsaw or handsaw. Assemble the pieces using wood glue and nails or screws. Paint the birdhouse in bright colors and add details like a roof, a perch, and an entrance hole. Kids can personalize their birdhouses with their own designs and decorations.

    Essential Woodworking Tools for Kids

    To complete the projects mentioned above, kids will need some basic woodworking tools. Here's a list of recommended tools for beginners:

    • Hand Saw: A hand saw is essential for cutting wood to size. It's important to choose a saw with a comfortable grip and sharp teeth.
    • Jigsaw: A jigsaw is a powerful tool that can cut intricate shapes in wood. It's best to supervise children when using a jigsaw and to use safety glasses.
    • Hammer: A hammer is used for driving nails into wood. Choose a hammer with a comfortable grip and a head that's the right size for the nails you're using.
    • Screwdriver: A screwdriver is used for driving screws into wood. It's helpful to have a set of screwdrivers with different sizes of tips.
    • Wood Glue: Wood glue is used for joining pieces of wood together. Apply it to the surfaces that will be joined and clamp the pieces together until the glue dries.
    • Sandpaper: Sandpaper is used for smoothing the edges of wood and removing any rough spots. Start with coarse sandpaper and gradually use finer grades to achieve a smooth finish.
    • Measuring Tape: A measuring tape is essential for accurately measuring wood pieces before cutting them.
    • Pencil: A pencil is used for marking wood pieces before cutting them.

    Adding a Personal Touch: Decorating the Wooden Creations

    Once the basic woodworking is done, it's time to add a personal touch to the projects. Here are some ideas for decorating the wooden creations:

    • Paint: Use acrylic paints to add color and designs to the wooden objects. Choose bright colors and create patterns, stripes, or polka dots.
    • Markers: Permanent markers can be used to add detailed designs, writing, or drawings on the wood.
    • Stencils: Use stencils to create intricate designs on the wooden objects. Apply paint through the stencil using a brush or sponge.
    • Decoupage: Decoupage involves applying paper, fabric, or other materials to wooden surfaces and sealing them with varnish or glue. Kids can use pictures from magazines, newspapers, or craft paper to create unique designs.
    • Embellishments: Add decorative elements like buttons, beads, ribbon, or fabric scraps to enhance the appearance of the wooden objects.

    Benefits of Woodworking for Kids

    Woodworking offers numerous benefits for children, both academically and personally. Here are some of the key advantages:

    • Creativity and Imagination: Woodworking provides a platform for kids to express their creativity and imagination. They can design and build unique objects that reflect their personality and interests.
    • Problem-Solving Skills: Woodworking involves planning, measuring, and problem-solving. Kids learn to think critically and find solutions to challenges.
    • Hand-Eye Coordination: Using tools and manipulating materials helps improve hand-eye coordination and dexterity.
    • Spatial Reasoning: Woodworking encourages spatial reasoning and the ability to visualize objects in three dimensions.
    • Patience and Perseverance: Completing a woodworking project requires patience and perseverance. Kids learn to work through challenges and stay focused until the project is complete.
    • Sense of Accomplishment: Creating something tangible with their own hands gives kids a sense of accomplishment and pride.

    Conclusion

    Woodworking offers a fantastic opportunity for kids to explore their creativity, develop valuable skills, and personalize their space. With proper supervision and guidance, kids can embark on a fulfilling journey of woodworking and create unique and meaningful objects that they can treasure for years to come.

    Tuesday, November 12, 2024

    How to Build a Tall Birdhouse with a Classic Design

    How to Build a Tall Birdhouse with a Classic Design

    Building a Tall Birdhouse with Classic Charm

    Hey there, bird lovers! Ready to give our feathered friends a stylish and spacious home? Today, we're going to build a tall, classic birdhouse that will look great in your garden and provide a cozy haven for birds of all sizes. Let's get our hands dirty!

    Gathering Your Supplies

    First things first, we need to gather our materials. You can find most of these at your local hardware store or online:
    • One piece of 1x6-inch pine board, 8 feet long (for the sides, roof, and base)
    • One piece of 1x4-inch pine board, 8 feet long (for the front and back)
    • One piece of 1/4-inch plywood, 12 inches by 12 inches (for the roof overhang)
    • Two 4-inch long wood screws for attaching the front and back to the sides
    • Two 1.5-inch long wood screws for attaching the roof to the sides
    • 12-inch long wood screws for attaching the base to the sides (length may vary depending on the thickness of the base)
    • Wood glue
    • Wood stain or paint (optional)
    • Weatherproof sealant (optional)
    • Measuring tape
    • Saw (hand saw or circular saw)
    • Drill with a 3/16-inch drill bit
    • Screwdriver
    • Clamps
    • Pencil

    Building the Birdhouse Base

    Let's start with the base. This will provide a sturdy foundation for our birdhouse:
    1. Cut two pieces of the 1x6-inch board to 6 inches in length. These will be the sides of the base.
    2. Cut one piece of the 1x6-inch board to 5 inches in length. This will be the back of the base.
    3. Cut one piece of the 1x6-inch board to 4 inches in length. This will be the front of the base. Make sure to center the front piece on the back piece before attaching them.
    4. Use wood glue and 12-inch long wood screws to attach the sides, front, and back to create a rectangular box.

    Creating the Birdhouse Walls

    Now we'll build the walls of our birdhouse:
    1. Cut two pieces of the 1x6-inch board to 12 inches in length. These will be the sides of the birdhouse.
    2. Cut two pieces of the 1x4-inch board to 6 inches in length. These will be the front and back of the birdhouse.
    3. Use wood glue and 4-inch long wood screws to attach the front and back to the sides, creating a box. You can choose to leave the front open for easy access, or create a small entrance for your birdhouse.
    4. Use wood glue and 12-inch long wood screws to attach the birdhouse box to the base. Make sure the base is centered and the sides are flush with the base.

    Crafting the Roof

    Time to add the roof, giving our birdhouse a classic touch:
    1. Cut two pieces of the 1x6-inch board to 8 inches in length. These will be the two sides of the roof.
    2. Cut one piece of the 1x6-inch board to 6 inches in length. This will be the front of the roof.
    3. Cut one piece of the 1x6-inch board to 7 inches in length. This will be the back of the roof.
    4. Use wood glue and 1.5-inch long wood screws to attach the front and back to the sides, creating a triangular roof shape.
    5. Use wood glue and 1.5-inch long wood screws to attach the roof to the top of the birdhouse walls, making sure the sides of the roof overhang the sides of the birdhouse slightly.

    Adding a Roof Overhang

    Let's create a classic overhang for our roof:
    1. Cut a piece of the 1/4-inch plywood to 5 inches by 7 inches.
    2. Attach the plywood to the front of the roof overhang, making sure it's flush with the bottom edge of the roof. Use wood glue and a few 1.5-inch wood screws.
    3. Repeat step 2 on the back of the roof overhang.

    Finishing Touches

    We're almost there! Let's personalize our birdhouse:
    1. Sand down any rough edges with sandpaper. This will give the birdhouse a smooth and polished look.
    2. If desired, you can stain or paint the birdhouse with your favorite color. Choose weatherproof paints and stains that are safe for birds. Make sure to let the paint dry completely before proceeding to the next step.
    3. Apply a layer of weatherproof sealant to protect the wood from the elements. This will help your birdhouse last for years to come.

    Choosing the Right Location

    Now it's time to find the perfect spot for your birdhouse:
    • Choose a safe location: Make sure your birdhouse is placed in a location that is safe from predators like cats, snakes, and squirrels.
    • Provide shelter: The birdhouse should be placed in an area that offers some shelter from the elements, such as under a tree or near a bush.
    • Offer visibility: The birdhouse should be placed in a location that is visible to birds. A spot that is open and not surrounded by dense foliage is ideal.
    • Consider height: Aim for a height of 5-8 feet above the ground. This will prevent predators from easily reaching the birdhouse.
    • Secure the birdhouse: Attach the birdhouse to a tree or post with sturdy screws or wire. This will prevent the birdhouse from blowing away or being knocked down by strong winds.

    A Few Final Tips

    • Keep it clean: Clean your birdhouse regularly to prevent the buildup of droppings and parasites. This will help keep your birdhouse healthy and attract more birds.
    • Be patient: Birds may take some time to find and get used to your new birdhouse. Don't be discouraged if it takes a while for them to move in.
    • Enjoy the show: Once birds start using your birdhouse, you'll have a front-row seat to the fascinating world of birdlife in your own backyard.
    So there you have it! A classic, tall birdhouse that is sure to attract a wide variety of feathered friends to your garden. Remember, building a birdhouse is a rewarding experience, and it's a great way to connect with nature and provide a safe haven for these amazing creatures. Happy building and enjoy watching your birdhouse come to life!

    Basic Squirrel Box Plans for Small Spaces

    Basic Squirrel Box Plans for Small Spaces

    Basic Squirrel Box Plans for Small Spaces

    Squirrels, with their charming antics and bushy tails, often become welcome additions to our backyards. But their playful nature can sometimes lead to mischief, especially when it comes to our gardens and bird feeders. A squirrel box, also known as a squirrel feeder or squirrel baffle, can be a helpful tool for managing their presence while providing them with a dedicated feeding area away from sensitive spots. In this guide, we'll explore various basic squirrel box plans specifically designed for smaller spaces.

    Understanding Squirrel Box Basics

    A squirrel box is essentially a feeder designed with features that discourage squirrels from accessing bird feeders or other areas where they are not welcome. These features typically include:

    • Elevated Platforms: Squirrel boxes are often elevated to prevent squirrels from easily accessing them. This can be achieved by mounting them on poles or using specialized hangers.
    • Shielded Feeders: The feeding mechanism of a squirrel box is typically designed to be difficult for squirrels to manipulate. This might involve using a cage, baffle, or other protective elements.
    • Smooth Surfaces: Squirrel boxes often have smooth surfaces, particularly on the pole or hanging structure. This discourages squirrels from climbing up.

    Types of Squirrel Boxes for Small Spaces

    When space is limited, consider these squirrel box designs tailored for smaller areas:

    1. Hanging Squirrel Baffles

    Hanging baffles are a popular choice for smaller spaces. They typically consist of a cone-shaped or dome-shaped structure that is hung from the bird feeder or feeding platform. The baffle's design prevents squirrels from climbing up the feeder's pole or rope. Some common types of hanging baffles include:

    • Conical Baffles: These resemble a wide, inverted cone. They effectively block squirrels from accessing feeders by making it impossible for them to climb.
    • Dome Baffles: These resemble a large, dome-shaped structure. They offer a more visual appeal compared to conical baffles and provide similar protection against squirrels.

    2. Platform Squirrel Feeders

    Platform feeders are a simple option for feeding squirrels. They provide a flat surface where squirrels can feed, often placed on a pole or stand. While these platforms don't actively deter squirrels from other areas, they can help keep them focused on a specific feeding spot. To prevent squirrels from climbing the pole, use a smooth, slippery material like metal or plastic.

    3. DIY Squirrel Boxes

    Building a squirrel box from scratch offers customization and the satisfaction of creating something yourself. You can use repurposed materials like plastic containers, metal sheets, or even wood scraps. These boxes should be designed to provide a secure, comfortable space for squirrels to feed.

    DIY Squirrel Box Plans

    Here's a basic DIY squirrel box plan for a small space:

    Materials:

    • Wood board (approximately 12 inches x 12 inches)
    • Metal or plastic sheet (for the baffle)
    • Screws and nuts
    • Wood glue
    • Paint (optional)
    • Pole or stand (for mounting)

    Steps:

    1. Cut the Wood Board: Cut the wood board into a square or rectangular shape. The size will depend on how much space you have available.
    2. Create the Baffle: Cut the metal or plastic sheet into a circular shape that fits inside the wood board. The baffle should be large enough to prevent squirrels from easily climbing over it.
    3. Attach the Baffle: Secure the baffle to the center of the wood board using screws or nuts. You can also glue the baffle to the board for additional stability.
    4. Add a Feeding Platform: You can add a smaller platform on top of the baffle, if desired, to provide a feeding surface for the squirrels. Use wood scraps or a small metal sheet for this.
    5. Paint the Box (Optional): Paint the wood board with a weather-resistant paint for protection and a more aesthetically pleasing appearance.
    6. Mount the Box: Mount the box on a sturdy pole or stand using appropriate hardware. Choose a location that is away from bird feeders and other areas where you want to keep squirrels out.

    Tips for Using Squirrel Boxes

    • Location: Choose a location that is easily accessible to squirrels but far away from areas where you don't want them to be.
    • Filling the Box: Fill the squirrel box with a variety of squirrel-friendly foods such as nuts, seeds, fruits, and vegetables. Avoid using processed foods as they can be harmful to squirrels.
    • Cleaning and Maintenance: Clean the squirrel box regularly to prevent the buildup of debris and mold. Replace the food regularly to ensure freshness.
    • Monitor for Squirrels: Monitor the squirrel box to see if squirrels are using it. If they are not, adjust the location or food offerings.
    • Be Patient: It may take some time for squirrels to become accustomed to the new feeder, so be patient and persistent.

    Conclusion

    Building a squirrel box for small spaces can be a simple and effective way to manage squirrels while providing them with a dedicated feeding area. By understanding the basic principles of squirrel box design and choosing a plan that suits your space, you can create a practical and welcoming solution for these bushy-tailed visitors. Remember to be patient, monitor the box regularly, and adapt your approach as needed to ensure a harmonious coexistence with these delightful creatures.

    Crafting a diy desk with rustic charm: beginner woodworking

    Crafting a diy desk with rustic charm: beginner woodworking

    Crafting a DIY Desk with Rustic Charm: A Beginner's Woodworking Adventure

    Hey there, fellow DIY enthusiasts! Are you yearning for a unique and charming desk that adds character to your space? Look no further than a rustic DIY desk project! It's surprisingly approachable, even for those who are new to woodworking. We'll walk through the process, step by step, with tips and tricks along the way. Get ready to unleash your creativity and build something truly special!

    Gathering Your Supplies: A Rustic Toolbox

    Before we jump into the building, let's gather our materials. You'll need a few key items for this project. Don't worry, it's not a huge list and most of these can be found at your local hardware store:

    • Lumber: Choose reclaimed or rough-cut lumber for that authentic rustic feel. Think about the size and shape of your desk. You'll need planks for the top, sides, and legs. I'm using rough-cut pine for my desk, it's a classic choice.
    • Wood Glue: Essential for bonding your pieces. Get a high-quality wood glue for a strong and durable bond.
    • Wood Screws: Choose screws that match your lumber. You'll need them for attaching the top to the sides and legs. I like to use 2-inch screws, they're sturdy but won't be too long.
    • Clamps: Clamps help keep your pieces securely in place while the glue dries.
    • Sandpaper: We'll smooth out any rough edges and give our desk a polished look. I recommend using a variety of grits, from coarse to fine.
    • Wood Stain or Paint: This is where you get to personalize your desk! Opt for a natural stain to enhance the wood's character or a paint for a fresh look. I'm going for a natural, rustic look, so I'll use a walnut stain. But hey, get creative!
    • Finish: To protect your desk from everyday wear and tear, apply a sealant like polyurethane. It creates a barrier and helps the stain or paint last longer.
    • Optional: Adding a drawer or shelf to your desk is totally doable. You'll need drawer slides, drawer front material, and additional wood for the drawer structure.

    Crafting the Foundation: Building the Desk Base

    Let's get started with the base! This is where you decide the size and shape of your desk. You can go for a classic rectangular design, a more modern L-shape, or even a whimsical curved design. The world is your oyster! Here's a step-by-step breakdown:

    1. Measuring and Cutting:

    Use a tape measure and pencil to mark the dimensions of your desk. You'll need to cut the wood for the sides, legs, and top. Make sure your measurements are precise, and use a saw to carefully cut the pieces. A circular saw is often the easiest for these cuts, but you can also use a hand saw if you prefer. Remember to always wear safety goggles and hearing protection when working with power tools!

    2. Joining the Legs:

    For the legs, you'll want them to be strong and stable. I'm using two legs on each side of my desk for extra support. You'll need to attach the top of the legs to the sides. I'll use pocket holes, which are pre-drilled holes on the inside of the wood that allow you to screw in the legs. If you're not using pocket holes, simply drill pilot holes for your screws to prevent splitting the wood.

    3. Attaching the Sides:

    Once the legs are attached, it's time to connect the sides. I'm using wood glue and screws to attach the sides to the legs. Clamp the sides to the legs while the glue dries for a strong bond. If you're going for a really rustic look, you might even want to use a few extra screws for added stability.

    Adding the Top: The Finishing Touch

    Now for the pièce de résistance - the desk top! You'll need to choose your wood for the top, making sure it's the right size and shape for your desk. Here's how to attach it:

    1. Securing the Top:

    I'm attaching my top with wood glue and screws. If you are using reclaimed lumber with lots of character, consider using countersinking screws, which are a bit more visually appealing. Simply drill the pilot holes for the screws a bit deeper than the screw length so that the screw head sits below the surface of the wood.

    2. Finishing Touches:

    Before you apply the stain or paint, take the time to sand your desk! This helps create a smooth surface, removes any rough edges, and lets the finish adhere more evenly. Start with a coarse grit sandpaper to remove rough spots and finish with a fine grit sandpaper to achieve a smooth finish.

    Personalizing Your Rustic Masterpiece

    Now comes the fun part - adding your personal touch with stain or paint! The choice is all yours. For a natural look, choose a wood stain that enhances the wood's grain. For a more bold statement, try a contrasting paint color. If you're feeling adventurous, try a mixed-media approach with stain and paint, or even incorporate stencils or decoupage.

    1. Applying the Finish:

    After you've applied your stain or paint, let it dry completely. Then it's time to apply the finish. I'm using polyurethane for my desk, but you can choose a finish that suits your needs and style. Polyurethane is a durable finish that protects your desk from scratches, water, and UV damage. Apply the finish in thin coats, allowing each coat to dry completely before applying the next. For a smoother finish, sand lightly between coats.

    Adding Extra Flair: Drawer or Shelf

    Ready to take your desk to the next level? Adding a drawer or a shelf can enhance functionality and add more rustic charm.

    1. Building a Drawer:

    Start by cutting your wood for the drawer sides, front, and back. Then attach the sides to the front and back with glue and screws. Next, add drawer slides to the inside of the drawer and the desk frame. Install the drawer and attach a handle or knob for easy access.

    2. Constructing a Shelf:

    To build a shelf, cut your wood to size and attach it to the desk frame using glue and screws. You can create a shelf that runs the entire length of your desk or a smaller shelf for books or decorative items. Be sure to choose a sturdy wood for your shelf, as it will need to support the weight of the items you place on it. You can add decorative brackets for an extra touch of rustic charm.

    Revealing Your Rustic Desk: A Moment of Pride

    Congratulations! You've completed your rustic DIY desk project! Take a moment to admire your handiwork. You've not only created a functional piece of furniture but also something unique and personal that you can be proud of. Enjoy your new desk and all the creative adventures it brings. Happy crafting!

    Diy magic box woodworking plans with detailed guide

    Diy magic box woodworking plans with detailed guide

    Building a DIY Magic Box: A Step-by-Step Guide

    Hey there, crafty folks! Ever dreamt of building a magical box that could seemingly conjure objects out of thin air? Well, you're in luck! Today, we're diving into the world of DIY magic boxes, and I'm going to guide you through the whole process. It's not actual magic, of course, but it's a clever trick that'll make your friends and family gasp in amazement. Ready to unleash your inner illusionist?

    What You'll Need

    Before we get into the nitty-gritty, let's gather the materials you'll need. Don't worry, it's nothing too complicated, just some basic woodworking essentials:

    • Wood: Choose your favorite wood! Pine, plywood, or even MDF will work. You'll need about 1/2-inch thick wood for this project.
    • Screws: Grab some wood screws, about 1-1/2 inches long.
    • Wood glue: This is essential for strong joints.
    • Measuring tape: You'll need this for accuracy.
    • Pencil: To mark your wood.
    • Saw: A circular saw or a jigsaw will work for cutting the wood.
    • Drill: For drilling pilot holes before screwing.
    • Sandpaper: Get a variety of grits to smooth out your surfaces.
    • Optional: A router, if you want to add some fancy trim or details.

    Step-by-Step Guide to Building the Magic Box

    Now, let's get down to business! Follow these steps carefully, and you'll be building a magical box in no time:

    1. Cutting the Wood

    Start by cutting your wood into the following pieces:

    • Bottom: One piece, 12 inches x 12 inches
    • Sides: Four pieces, 12 inches x 4 inches
    • Top: One piece, 12 inches x 12 inches
    • Divider: One piece, 4 inches x 12 inches (for the secret compartment)

    Use your saw carefully and make sure your measurements are precise. A bit of accuracy goes a long way in this project!

    2. Assembling the Box

    Okay, here's where the magic happens! We're going to create a secret compartment within the box, which is the key to the illusion:

    1. Glue and Screw: Apply wood glue to the edges of the bottom piece and attach the four side pieces around it, forming a box without a top. Make sure the corners are square. Secure the sides with screws.
    2. Secret Compartment: Position the divider piece about 4 inches from the front edge of the box and glue it to the bottom and back side pieces. Secure it with screws.
    3. Top Piece: Attach the top piece to the box, using wood glue and screws. This piece should overlap the divider, leaving a small gap at the back of the box. This gap will be the secret access for your hidden object!

    3. Sanding and Finishing

    Now, it's time to make your box look nice!

    • Sand: Smooth out any rough edges and imperfections with sandpaper. Start with a coarse grit, then work your way up to a fine grit for a smooth finish.
    • Finish: Stain or paint the box to your liking. You can even add some fancy details like decorative trim or embellishments to make it extra special!

    Making the Magic Happen

    We've got the box built, but how does the "magic" work? It's all about a little clever design! Here's the secret:

    • The Hidden Object: You'll need a small object that can fit into the secret compartment. Think of a small ball, a coin, or even a simple piece of paper.
    • The Trick: The object is placed in the secret compartment through the small gap at the back of the box. When you present the box, the object seems to appear magically!

    Staging the Illusion

    Now, let's make the magic happen. You'll need to practice a bit to get the timing right:

    • Present the Box: Show your audience the empty box, making sure they see both the front and the back.
    • The "Magic" Moment: While their attention is focused on the front of the box, discreetly use your hand to slide the hidden object forward from the secret compartment into the main section of the box.
    • The Reveal: Now, the object appears to have magically materialized inside the box!

    Pro Tips for Your Magic Box

    Ready to elevate your magical illusions? Here are a few pro tips to make your magic box performance even more impressive:

    • Practice, Practice, Practice: Practice your movements and timing to ensure a smooth and convincing illusion. The more you practice, the more confident you'll be!
    • Misdirection: Use misdirection techniques to keep your audience's attention away from the back of the box while you're making the object appear. A good distraction could be a simple question or a funny story!
    • Stage Lighting: Dim lighting can add to the mystery and illusion.
    • Add a Dramatic Touch: Consider adding a dramatic flourish or a simple sound effect to emphasize the magical moment.
    • Think Beyond the Box: This basic magic box design can be modified and customized for different illusions. Use your imagination to create your own unique magical creations!

    Conclusion

    There you have it! Now you're ready to astound your friends and family with your DIY magic box. It's a fun and rewarding project that combines creativity and a bit of magic. Remember, the key to a great illusion is practice and a little bit of showmanship! So, go forth and create some magical moments!

    Step-by-Step Squirrel Box Plans to Download

    Step-by-Step Squirrel Box Plans to Download

    Step-by-Step Squirrel Box Plans: Build a Cozy Home for Your Bushy-Tailed Friend

    Hey there, nature lover! Ever thought about building a cozy little home for your neighborhood squirrels? They're cute, curious, and always bustling around, and giving them a place to rest their furry heads can be a rewarding experience. Plus, it's a fantastic way to get some DIY practice and connect with nature. So, let's get started! This article will guide you through building a squirrel box, step by step, from gathering materials to adding the finishing touches.

    Choosing the Right Spot for Your Squirrel Box

    Before you even think about grabbing your tools, it's important to choose the perfect spot for your squirrel box. Think about the squirrels you want to attract - where do they usually hang out? Here are some tips to help you decide:

    • High and Safe: Squirrels need a safe haven, so aim for a spot at least 6 feet off the ground, away from predators and the curious noses of neighborhood dogs. A sturdy tree trunk is the perfect choice.
    • Facing the Sun: Just like us, squirrels appreciate a little warmth. Place the box on the sunny side of the tree, but avoid direct sunlight, which can heat the interior too much.
    • Easy Access: Make sure there are plenty of branches nearby so the squirrels can easily jump onto the box. A branch directly above the entrance is ideal.
    • Consider the View: Squirrels are naturally observant. Pick a location that gives them a clear view of their surroundings, allowing them to keep an eye out for any potential threats.

    Gathering Your Supplies: What You'll Need

    Now that you've got the location picked out, it's time to round up your supplies. Here's a list of everything you'll need to build your squirrel box:

    • Wood: Choose a weather-resistant wood like cedar or redwood. You'll need about 8 feet of 1x6 inch boards, and a couple of 1x4 inch boards for the roof. You can also use plywood, but make sure it's exterior-grade.
    • Screws: Use 2-inch screws for the main construction and 1-inch screws for attaching the roof.
    • Saw: A handsaw or circular saw will help you cut the wood to size.
    • Drill: A drill is essential for pre-drilling pilot holes to prevent the wood from splitting when you screw it together.
    • Measuring Tape: You'll need a tape measure to cut the wood accurately.
    • Level: A level will ensure that your box is built straight and true.
    • Hammer: You might need a hammer to tap the wood into place during construction.
    • Wood Glue: This will add extra strength and seal the joints of your box.
    • Paint or Stain: Optional, but a coat of weatherproof paint or stain will help protect your box from the elements.
    • Safety Glasses and Gloves: Always wear safety glasses and gloves when using power tools.

    Squirrel Box Plans: Putting It All Together

    Let's get down to business and build our squirrel box! Here are the steps you'll need to follow:

    Step 1: Cutting the Wood

    Start by cutting the 1x6 inch boards to the following dimensions:

    • Front and Back Panels: 10 inches long
    • Sides: 8 inches long
    • Floor: 8 inches long
    • Roof: 10 inches long

    Cut two pieces of 1x4 inch board for the roof supports, each 8 inches long.

    Step 2: Assembling the Box

    Now it's time to put the pieces together:

    • Base: Attach the floor panel to the bottom edge of the front and back panels using wood glue and screws. Ensure the sides are flush and secure.
    • Sides: Attach the side panels to the base, joining the front and back panels. Make sure the sides are square and secure.

    Step 3: Creating the Entrance

    The entrance hole is the most important part of your squirrel box. It needs to be the right size for the squirrels to easily enter and exit.

    • Size: The entrance hole should be approximately 2 inches in diameter. This allows adult squirrels to enter easily while keeping out predators and other unwanted guests.
    • Placement: Position the entrance hole about 3 inches from the top of the front panel. This will help prevent rain from getting inside the box.
    • Cutting the Hole: Use a drill bit or jigsaw to cut a circular hole in the front panel. Round off the edges of the hole with sandpaper to prevent any splinters that could injure the squirrels.

    Step 4: Building the Roof

    The roof of your squirrel box needs to keep the squirrels dry and protected from the elements.

    • Supports: Attach the two 1x4 inch roof supports to the inside of the box, one at each end, with the bottom edge of the supports flush with the top edge of the sides. Space the supports about 6 inches apart.
    • Roof Panel: Place the roof panel on top of the supports, making sure it overhangs the sides of the box by about an inch. Attach the roof panel to the supports with screws.
    • Optional Hinge: If you want to create a hinged roof for easy access, you can use a hinge to attach the roof to the box.

    Step 5: Finishing Touches

    You're almost done! Here are a few finishing touches to make your squirrel box extra cozy:

    • Ventilation: Drill a few small holes in the back panel for ventilation. This will help prevent moisture buildup inside the box.
    • Paint or Stain: Apply a coat of weatherproof paint or stain to the outside of the box to protect it from the elements. Choose a color that blends in with the surrounding environment to avoid attracting unwanted attention.

    Installing Your Squirrel Box: Making It Feel Like Home

    You've built a beautiful squirrel box - now it's time to give it a permanent home!

    • Mounting: Securely mount your squirrel box to the tree using sturdy screws or nails. Make sure the box is level and won't easily fall or move.
    • Adding Bedding: Line the inside of the box with soft, natural bedding like shredded leaves, straw, or pine shavings. This will make the box comfortable and inviting for the squirrels.
    • Patience: Don't be discouraged if you don't see any squirrels right away! It might take a few weeks or even months for them to discover their new home. Just be patient and keep your box well-maintained.

    There you have it - your very own handcrafted squirrel box, a testament to your love for nature and your DIY skills! Watching squirrels settle into their new abode is truly heartwarming. Remember to keep your box clean and check it regularly for any signs of damage or wear and tear. Happy building, and may your squirrel box attract plenty of happy tenants!

    Affordable Cold Frame Building Ideas

    Affordable Cold Frame Building Ideas

    Affordable Cold Frame Building Ideas

    Cold frames are simple, inexpensive structures that can extend the growing season for gardeners. They provide a protected environment for seedlings, transplants, and even some cold-hardy vegetables throughout the year. Building a cold frame yourself can be a rewarding project that allows you to personalize the design to fit your needs and budget. Here are some affordable cold frame building ideas:

    DIY Cold Frame Designs

    There are numerous ways to construct a cold frame using readily available materials. These designs often require minimal tools and skills, making them accessible for beginners.

    Recycled Materials Cold Frame

    One of the most budget-friendly approaches is to utilize recycled materials. Old windows, doors, and even discarded pallets can be repurposed to create a functional cold frame. This approach not only reduces waste but also contributes to a sustainable gardening practice.

    • Window-Based Cold Frame: Use an old window frame or a salvaged storm window as the base for the cold frame. Find a piece of wood or a recycled pallet for the bottom and attach the window frame to it. This simple design provides clear visibility and allows sunlight to reach the plants effectively.
    • Door-Based Cold Frame: An old door can also serve as the frame of a cold frame. You can use a piece of wood or a recycled pallet to create a base, and then attach the door to it. This design offers a more substantial construction than the window frame.
    • Pallet Cold Frame: Utilize a pallet to create a frame structure for the cold frame. The pallet can be used as is or disassembled and repurposed for the frame. Place a piece of glass, plastic, or polycarbonate sheet on top of the pallet for the cover.

    Simple Wood Frame Cold Frame

    Constructing a basic wooden cold frame is another affordable option. You can use treated lumber or even inexpensive pine boards for the frame. This design allows for more customization in terms of size and shape.

    • Framing: Cut and assemble the wooden frame using basic carpentry skills. You can choose a simple rectangular shape or opt for a more elaborate design with angled walls.
    • Base: Create a base for the frame using plywood, boards, or even cinder blocks. The base should be sturdy and level to ensure proper drainage.
    • Cover: Select a suitable cover for the cold frame. Options include glass, polycarbonate sheets, or even plastic sheeting. Glass provides excellent light transmission but is more prone to breakage. Polycarbonate sheets offer greater durability and insulation. Plastic sheeting is the most budget-friendly choice but may not be as durable or transparent.

    Important Considerations for Cold Frame Construction

    Once you have decided on a design, there are several important considerations to ensure the success of your cold frame.

    Location and Orientation

    Choose a location for your cold frame that receives ample sunlight, preferably facing south. This ensures maximum solar gain, which is crucial for plant growth. Avoid areas prone to excessive shade or wind, as these can negatively affect the microclimate inside the cold frame.

    Ventilation

    Proper ventilation is essential for regulating temperature and humidity within the cold frame. Incorporate vents on the sides or top of the frame to allow for air circulation. These vents can be adjustable to control airflow depending on weather conditions. You can use removable boards, louvers, or even simple hinges to create vents.

    Drainage

    Adequate drainage is vital to prevent waterlogging, which can damage plants. Ensure that the base of the cold frame slopes slightly to allow water to drain away. You can add a layer of gravel or crushed stone to the base to further improve drainage.

    Heating

    While cold frames are designed to provide protection from the elements, they may need additional heating during cold weather. You can use a simple heat mat, a small electric heater, or even a few strategically placed water bottles to maintain a suitable temperature. Consider using a thermometer to monitor the internal temperature and adjust heating accordingly.

    Tips for Maximizing Cold Frame Use

    Once your cold frame is built, here are some tips for maximizing its effectiveness and extending the growing season:

    • Start Seeds Early: Use the cold frame to start seeds indoors earlier in the spring than you would traditionally. This gives your plants a head start and allows them to establish a strong root system before transplanting outdoors.
    • Harden Off Seedlings: Before transplanting seedlings from the cold frame to the garden, gradually acclimate them to outdoor conditions. This process, known as hardening off, reduces transplant shock and ensures successful establishment.
    • Protect Plants from Frost: In the late fall and early winter, use the cold frame to protect frost-sensitive plants from freezing temperatures. You can extend the growing season for many vegetables and herbs by providing a cold frame refuge.
    • Overwinter Plants: Some hardy vegetables, like kale, spinach, and lettuce, can be overwintered in a cold frame. This allows you to enjoy fresh produce even during colder months.

    Conclusion

    Building an affordable cold frame is a rewarding project that can significantly benefit your gardening endeavors. By utilizing recycled materials, simple construction techniques, and a few essential considerations, you can create a functional and efficient cold frame that extends the growing season and enhances your gardening experience. With a little creativity and ingenuity, you can transform your garden into a haven for plants throughout the year.

    Building a Cold Frame for Backyard Gardens

    Building a Cold Frame for Backyard Gardens

    Building a Cold Frame for Your Backyard Garden

    Hey there, green thumbs! Tired of waiting for the weather to cooperate before you can start planting? Or maybe you just want to give your seedlings a head start in the spring? Well, let me tell you, building a cold frame is a game changer for any backyard gardener. Think of it as a mini greenhouse that's perfect for extending your growing season and protecting your delicate plants from the elements.

    Now, before you start thinking this is some super complicated project, let me assure you, it's not! In fact, building a cold frame is surprisingly easy and affordable. All you need are a few basic materials and some basic DIY skills. Ready to get started? Let's dive in!

    Why Build a Cold Frame?

    So, why should you consider building a cold frame? Here's the deal: it's like giving your plants a cozy little haven, a mini-greenhouse that provides them with:

    • Protection from Frost and Cold: A cold frame acts like a shield, safeguarding your plants from those pesky late frosts and early freezes that can wreak havoc on your seedlings.
    • Warmer Temperatures: The sun's rays can easily warm up the air inside the cold frame, creating a mini microclimate that's warmer than the surrounding environment.
    • Moisture Control: The glass or plastic covering of a cold frame helps trap moisture, which is especially beneficial for delicate seedlings that need consistent hydration.
    • Longer Growing Season: By creating a warmer and more protected environment, you can start planting earlier in the spring and extend your harvest well into the fall.

    But wait, there's more! Cold frames are also super versatile:

    • Starting Seeds: They're ideal for starting seeds indoors and then hardening them off before transplanting them to the garden.
    • Overwintering Tender Plants: Protect your delicate perennials and tropical plants during the winter months by bringing them indoors or placing them in a cold frame.
    • Propagating Plants: Create cuttings and encourage root development for future garden additions.

    Alright, convinced yet? I thought so! Let's move on to the good stuff â€" actually building your cold frame.

    Materials You'll Need

    Before you start hammering and sawing, gather these essential materials:

    • Frame: You have a few options here:
      • Wood: Durable and easy to work with. Choose rot-resistant wood like cedar or redwood for longevity.
      • Metal: Offers strength and durability, but it can be more expensive. Consider galvanized steel or aluminum.
      • PVC Pipe: Affordable and lightweight. Look for PVC pipe designed for outdoor use.
    • Covering:
      • Glass: Allows for maximum sunlight penetration. Choose tempered glass for safety.
      • Polycarbonate Panels: Durable, lightweight, and offer good insulation. Consider clear or frosted panels.
      • Plastic Sheeting: A budget-friendly option, but may need replacing more frequently.
    • Hinges: For attaching the cover to the frame.
    • Hardware: Screws, nails, brackets, and other fasteners, depending on your chosen frame material.
    • Optional: A layer of insulation (like foam board) can help improve temperature regulation, and a base of gravel or pavers will help with drainage.

    Now, grab your tools and let's get building!

    Building Your Cold Frame: A Step-by-Step Guide

    Let's break down the construction process into easy-to-follow steps. We'll be using a simple wooden frame as an example, but you can easily adapt this to your preferred materials:

    Step 1: Design and Measure

    Before you start cutting wood, decide on the size and shape of your cold frame. A standard size is about 3 feet wide by 4 feet long, but you can customize it to fit your needs. Draw a sketch and measure your chosen location carefully. Consider the space you have and the plants you want to grow.

    Step 2: Cut the Wood

    Using your measurements, cut the wood for the sides, the back, and the front of your cold frame. You'll need two identical pieces for each side. If you're using wood, it's best to use pre-cut lumber from your local hardware store. Remember to cut the pieces slightly longer than your measurements to allow for the thickness of the wood when assembling.

    Step 3: Assemble the Frame

    Lay out the sides and the back of the frame on a flat surface. Attach the sides to the back using screws or nails. You can reinforce the corners with additional brackets for extra strength. Secure the front piece to the frame, but don't screw it in all the way. This will allow for easy access when you need to open the frame.

    Step 4: Add Insulation (Optional)

    If you want to enhance the insulating properties of your cold frame, you can add a layer of insulation to the inside. Use foam board or rigid insulation, cutting it to fit the interior of the frame. Attach the insulation using construction adhesive or screws.

    Step 5: Install the Cover

    Now, it's time to attach the cover. If using glass, secure it to the frame with glazing clips. If using polycarbonate panels or plastic sheeting, attach them using brackets or screws. Install the hinges on the front side of the frame, allowing the cover to swing open.

    Step 6: Base and Drainage

    Set your cold frame on a base that provides good drainage. A layer of gravel or pavers placed in a slightly raised area can help prevent water from accumulating around the frame.

    Step 7: Add a Ventilation System

    To prevent excessive heat buildup inside the frame, you'll need to add a ventilation system. You can do this by adding a small window or opening at the top of the cover. If using a plastic cover, simply cut a small flap near the top and secure it with Velcro or snaps. You can also use a piece of wood or a piece of metal to create a simple vent opening.

    Step 8: Fill with Soil and Plant

    Once your cold frame is assembled, fill it with soil and plant your seeds or seedlings. Make sure to water them thoroughly and keep an eye on the temperature and moisture levels. Adjust the ventilation system as needed to maintain the optimal conditions for your plants.

    Tips for Using Your Cold Frame

    Now that you've built your cold frame, here are a few tips to help you make the most of it:

    • Monitor Temperature: Keep an eye on the temperature inside the frame. Use a thermometer to monitor the temperatures and adjust ventilation accordingly. Aim for temperatures between 45°F and 85°F for optimal plant growth.
    • Water Regularly: Check the soil moisture regularly, especially during dry spells. Water your plants as needed, but avoid overwatering.
    • Protect from Wind: Consider placing a barrier like a piece of burlap or a tarp around the frame if you're expecting high winds.
    • Hardening Off: If you're starting seeds indoors, make sure to harden them off before transplanting them to the cold frame. This involves gradually exposing them to outdoor conditions over a few weeks.
    • Clean Regularly: Clean the frame regularly to prevent the buildup of dust and debris, and replace the cover if it becomes damaged or cracked.
    • Enjoy the Benefits: Relax and enjoy the fruits (and vegetables) of your labor! Your cold frame will provide you with a longer growing season and a bounty of fresh produce throughout the year.

    There you have it, green thumbs! You've now got a cold frame to extend your gardening season and help your plants thrive! Remember, there's no one right way to build a cold frame, so feel free to get creative and experiment with different designs and materials. Now get out there and start growing!